
Archives

Modern Condo Kitchen Designs and Layouts
Modern Condo Kitchen Designs and Layouts
Are you looking for modern condo kitchens designs? Then this post is for you. No need to compromise on style when designing condo kitchens! With a proper design plan, you can create a kitchen that will impress your guests and make cooking a breeze. In this article, we’ll discuss modern condo kitchen designs and layouts, as well as tips for creating an inviting, functional kitchen space.
With the right planning and design, you can create a modern condo kitchen that will make your guests go wow. Canada-based experienced, trusted, and reliable kitchen cabinet and renovation services can help you make your dream kitchen come true.
What to Look in Modern Condo Kitchens Design
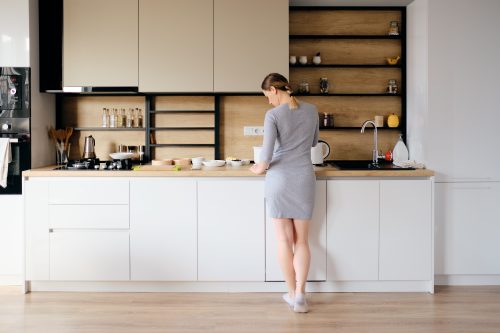
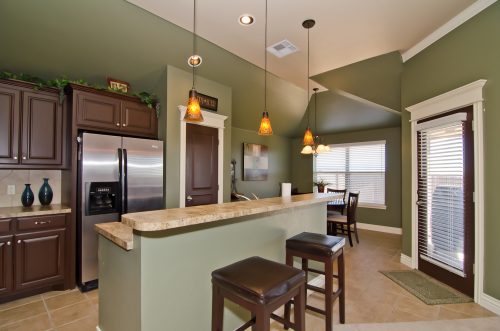
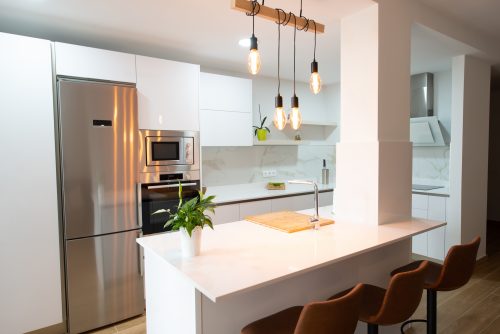
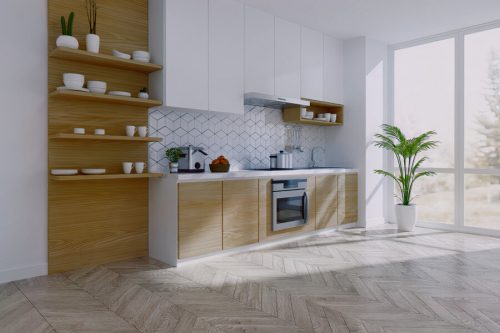
For those looking for a modern and stylish kitchen renovation in Canada, simplicity and built-in appliances are key. Choose colors that are light and airy, like whites and pastels, to give the space an open and inviting feel. Opt for sleek lines and don’t be afraid to play with light to achieve a clean and uncluttered look.
Choose items that are built-in and will stay in place for years to come. Incorporating different textures, like countertops and flooring, can break up the monotony of a space and create interest. Finally, consider cabinet designs that make good use of the available space and maximize efficiency.
Types of Modern Condo Kitchens Layouts
There are mainly four types of modern condo kitchens layouts that can be used when designing a kitchen. These types vary depending on your needs and wants and the way that you want to use your kitchen space.
Furnishing your unit with modern appliances, cabinets and fixtures is necessary since they add to its aesthetic beauty and enhance its functionality as well. It will also increase the comfort that you feel while cooking, preparing and serving food.
Galley layout
Living in a condo has its perks, but space tends to be limited. Galley kitchens are the perfect solution for those looking to make the most of their space. Featuring two parallel sides of cabinets and appliances, plus an island in the middle, a galley kitchen provides a long, narrow space with waterfall countertops on both sides.
While this design offers an open-plan kitchen layout, the downside is often less storage and counter space. To make the most of this design, you’ll need a long wall to fit all your appliances. Additionally, you can use the island as a dining table or breakfast area. With a few clever tweaks and thoughtful design, you can turn a small space into a sleek and stylish kitchen.
L-shaped layout
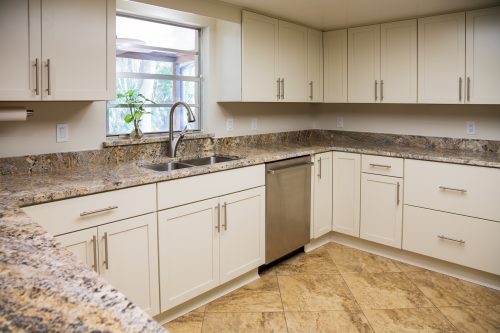
An L-shaped kitchen layout is a great choice for condo kitchen renovations, as it offers several benefits. This design maximizes space and promotes interaction. It’s also suitable for smaller kitchens, as it allows several people to work at the same time and enjoy conversation with guests. The separate areas in an L-shaped kitchen also make it perfect for optimizing space.
However, one drawback to this layout is that you can’t incorporate a kitchen island. Additionally, an L-shaped kitchen is often combined with a separate, large dining area, which may not be the most suitable option for condos. Nevertheless, if you’re looking to maximize space and optimize your kitchen layout, an L-shaped design is definitely worth considering.
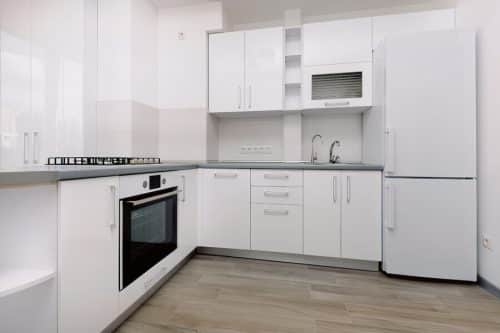
U-shaped layout
A U-shaped layout in a condo kitchen is a kitchen configuration that consists of three walls of cabinetry and counters, which form a U-shape. This layout is great for condos with more space, as it allows for plenty of counter space and storage, while still keeping the kitchen open and inviting. Because the walls of cabinetry and counters form a U-shape, this layout can be a great way to maximize the limited space of a condo kitchen. Additionally, because the U-shape is open on one side, it allows for an unobstructed view into the living space, making the kitchen feel even more connected with the rest of the condo.
If you’re looking to remodel your condo kitchen, a U-shaped layout is the perfect option for you. Offering three walls of cabinets, appliances, and counter space, this layout provides ample working space in the middle for cooking and entertaining. Plus, it gives you plenty of storage, so you don’t have to compromise on space. However, if it’s not designed properly, the U-shaped kitchen can feel cramped. Make sure you have enough room for this layout to work, and you’ll be set!
What Else Do You Need in Your Modern Condo Kitchen Design
When it comes to renovating your condo kitchen, there are a few important considerations to keep in mind. The overall layout will determine your cabinet layout, so be sure to talk through your plans with a kitchen designer. If you have the space, consider incorporating a floor-to-ceiling unit for extra storage.
Make sure the cabinet fronts coordinate with the rest of your kitchen’s finishings. For small kitchens, full-height cabinets are a great idea to make the most of the limited space. Additionally, it’s probably best to opt for closed cabinets instead of open shelving if storage is important. Open shelving looks great, but isn’t always the most functional choice for a small kitchen.
Experiment with Lighting
In a condo kitchen, where space is limited, proper lighting is a real must-have. Here are some ideas to brighten up your kitchen:
- Under-cabinet lighting – provides extra light on countertops and illuminates hard-to-reach places;
- Pendant lights – adds style and personality to your space and can be used to highlight key features in the kitchen;
- Consider other lighting sources – for instance, recessed lighting, wall sconces and LED strip lights.
No matter what type of lighting you choose, make sure it is energy-efficient and up-to-date with the latest styles. With the right lighting, you can make the most of your condo kitchen and create a bright and inviting atmosphere.
Choose Proper Appliances
When selecting appliances for your sleek condo kitchen, consider what you need and what you can do without. If you’re an avid cook, you’ll need a good stove and oven. If you host parties often, opt for a larger fridge and freezer.
To create a warm and inviting atmosphere, integrated appliances that blend into the cabinets will do the trick. For smaller spaces, opt for more compact appliances. Wall ovens are an excellent choice for modern kitchens. Before you commit to any appliance package, we suggest you consult your design team.
Consider Various Materials for Countertops
When choosing the perfect countertop for a small condo kitchen, it is important to consider the size of the space and the amount of activity the countertop will need to withstand. Take into account the overall aesthetic of the kitchen and the type of material that will suit the look. For a smaller kitchen, materials such as quartz, laminate, granite, solid surface, or marble are all great choices as they are durable, easy to maintain, and offer a variety of colors and textures.
Additionally, choosing a countertop with an undermount sink can help create the illusion of more space. Don’t forget about the cost of the countertop, as some materials can be significantly more expensive than others.
Shop for a Backsplash and Undermount Sink
For a modern kitchen renovation in Canada, we recommend using a full-height or glass tile backsplash. This is the new gold standard for contemporary kitchen design. To complete the look, install an undermount sink. Top-mounted sinks are outdated and create an untidy look. The undermount sink is a great option for a contemporary kitchen. It can be conveniently converted to counter space for cooking, and is easy to keep clean.
Final thoughts
Modern condo kitchens designs and layouts are all about creating a functional and stylish kitchen that makes the most of the limited space available. From full-height and glass tile backsplashes to undermount sinks and workstation sinks, there are many ways to create a stylish kitchen in a condo. Carefully selecting the right materials, light and appliances can create a kitchen that is both aesthetically pleasing and highly functional.
How To Accessorize A Kitchen Counter
How To Accessorize A Kitchen Counter
How to accessorize your kitchen counter with items you already have in your house and some new pieces you can add yourself. Plus, what items are best to start with? To finish it off, get inspired by some great examples of kitchens that have used counter decor to its full potential! If you want to know how to accessorize a kitchen counter, look no further than this guide!
How To Prepare Your Counter
- Wipe down your counters with a damp cloth and soapy water. This will remove any dirt, grease, or food particles that may be on the surface.
- Once the counters are clean, dry them off with a towel.
- If you have any old countertop appliances or decorations, get rid of them. You want to start with a clean slate.
- Decide what kind of style you want for your counters. Do you want them to be modern? Rustic? Minimalist? Eclectic?
- Once you have decided on a style, start shopping for new countertop accessories and decorations that fit that aesthetic.
- When you have all of your new goodies, begin styling your counters!
How To Choose Accessories
When it comes to decorating your kitchen counters, the sky is the limit. But with so many options available, it can be tough to decide what to put on display. Here are a few tips to help you choose the perfect accessories for your kitchen counters.
The first step in styling your kitchen counters is figuring out what type of style you want to go for. Do you want an industrial vibe? Mid-century modern?
Whichever one you go for, it’s important that all of the elements in the space work together and compliment each other. If your style preference leans more towards rustic or vintage, then keep this in mind when selecting accents.
The same goes if more modern or contemporary feels like the right fit for your home; everything should work together and have a cohesive look about it! Once you know what style feels best to you, start looking at individual pieces that will contribute to that feel without going overboard and ruining its natural aesthetic.
Kitchen Backsplash Ideas
It might be difficult to accessorize a kitchen counter if you don’t know what to look for. The best method to style kitchen countertops is with kitchen backsplash designs.
The kitchen backsplash is one of the most important elements of a kitchen, as it is the first thing that people see when they walk into your home. It is also the first thing that they touch when they put their hands on your countertops.
Kitchen backsplashes come in many different styles and materials. Some of the most popular choices include tile, glass, metal, and wood. In addition to being functional and decorative, a backsplash can also be used as a way to express your creative side.
When choosing a backsplash, there are many factors to consider:
- Color – You want this feature to be eye-catching but not overpowering so choose wisely!
- Material – You’ll want something durable enough for everyday use but also easy to clean if it gets dirty or stained.
- Texture – Smooth or textured? This is all about personal preference but texture can help hide imperfections in wall surfaces if you have any rough spots or bumps that need covering up.
There are a couple of common backsplash ideas that can literally add an aesthetically appealing splash to your kitchen.
- Glass Tile Backsplashes: Glass tile is an excellent choice for those who want something modern yet traditional at the same time. Glass tiles come in an endless variety of colors and patterns, so you can pick one that matches your style perfectly!
- Natural Stone Backsplashes: Natural stone tiles are another great option for those who want something more traditional or rustic in their kitchen backsplash design. Natural stone tiles come in many different shapes and sizes and can be installed with grout or without grout (if laid flush against walls).
- Wooden Backsplashes: This type of backsplash is made from wood planks that are nailed together in an overlapping pattern. They are very easy to install as long as you have some basic carpentry skills. They are also durable and easy to maintain as they can be kept clean with just a damp cloth or sponge if they get dirty over time or if there are any spills on them in your kitchen (you may need something stronger like bleach if there is food splattered on them).
Add Some Greenery
One of the easiest ways to add some kitchen countertop styling is by adding some greenery. This can be in the form of plants, flowers, or even herbs. Not only will this add some color and life to your space, but it can also make your kitchen smell great. Plus, if you choose edible plants, you’ll always have something fresh to cook with. Some of our favorite kitchen countertop plants are
Grab Some Colorful Linens
Kitchen countertop decoration can also be done with some colorful linens! Adding a pop of color is an easy way to inject some personality into your space. Plus, it’ll make your kitchen feel more inviting and homey.
A bright kitchen doesn’t need any help being welcoming or charming. So take a cue from the cozy bistros in Paris, where you can often find multi-colored tablecloths on the counters. Kitchen counters styled with fabric or colored towels are at once modern and pretty! And what’s not to love about those juicy-looking tomatoes nestled between the pillows?
If you’re working with limited square footage, look for smaller pieces that still have a big impact. Like this simple but beautiful wicker basket filled with green apples – so stylish it could easily double as decor for the living room (it just needs some glamour shot photography)!
Counter Decor Ideas
Everyone has a different kitchen counter decor idea that they find attractive, and here are a few of some common ideas:
Mirrors
Mirrors can add light and dimension to any room, but especially in small kitchens where they help make the space seem bigger than it really is. You can hang them above cabinets or along walls and add more light by placing lamps behind them.
Counter Space
Create extra counter space with a floating shelf above your sink; it’s perfect for displaying plants or placing cookbooks within reach while cooking.
Photos
Frame your favorite photos from recent family vacations and hang them on the wall above the kitchen bar.
Final Thoughts
Kitchen countertop design and decoration can be a fun and exciting experience that will have your kitchen looking more inviting and comforting than ever before.
How To Remove Kitchen Cabinets
If you’re a DIY type of person and need to remove your old kitchen cabinets, then you’ll want to follow this guide on how to do exactly that. Check out these steps on how to remove kitchen cabinets.
Removing kitchen cabinets can seem like an impossible task if you’ve never done it before, but with the right tools and some careful planning, it’s quite simple to take off your cabinets and make room for new ones to be installed! So let’s figure out how to remove kitchen cabinets.
Preparing For Kitchen Cabinet Removal
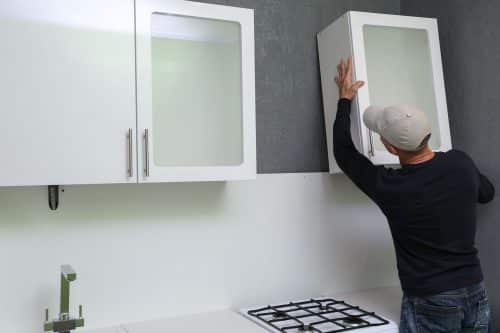
Wall-mounted cabinets are usually easy to take down without too much trouble. But if your cabinets are old or particularly hard to disassemble, you may need to rip them out from the wall. When you’re trying to remove your kitchen cabinets, be careful not to damage the drywall as you lower the old cabinets down.
You may need a partner to help safely take them apart. If so, be sure to communicate and work together so that the job gets done quickly and efficiently. It’s also important to plan ahead by shutting off power in any areas where power tools will be used.
Remove all doors, shelves, drawers, and hardware before removing the cabinets. Depending on how long they have been there, it could take some time for the paint on the walls to release from all those surfaces. Once removed, wipe down everything with mineral spirits and then repaint after making any repairs (if necessary).
Some tools that you’ll require for kitchen cabinet removal are:
- Drill
- Gloves
- Pry bar
- Utility knife
- Hammer or mallet
- Goggles
- Putty knives
Once you are sure that you have all of your tools and preparations in place, you can begin removing your old cabinets. The first step is to secure any delicate objects on your countertop with bubble wrap or other material that will protect them from falling into open areas underneath the cabinet.
how to remove kitchen cabinets
The hardest part of removing a kitchen cabinet is getting started. Once you have the right tools, the process is relatively simple. As already mentioned, remove all the doors and drawers from the cabinet. This step just makes the entire cabinet removal process much easier.
Next, disconnect any electrical wiring that may be attached to the cabinet. Finally, use a screwdriver or drill to remove the screws that hold the cabinet in place. As you’re removing the screws from the cabinets, you’ll want to have a friend or family member hold your cabinets so they don’t come crashing down after the screws have been removed.
Once you’ve removed all of your kitchen cabinet doors and drawers, disconnect any electrical wiring or gas lines that may have been attached. Be sure to turn off all switches before working with them. Use a screwdriver or drill to remove screws attaching your cabinets to your walls or countertops.
Using a screwdriver can be tricky because it requires precision, but you can use an electric drill for speedier removal. For very stubborn screws, consider using an adjustable wrench instead of a screwdriver; it provides more leverage than a screwdriver and will help you bust through tough spots.
If you have wall-mounted cabinets, starting at one corner of your room, use a hacksaw and trim any nails holding them in place. Remove any screws and remove one end of the cabinet from its hanger. Then carefully pull it away from the wall and push it up against another wall so that you can work on the other side. If your cabinet isn’t removable from its hanger, you may have to pry it off with a crowbar, depending on how hard or soft your walls are.
After Removing Kitchen Cabinets
- After you’ve removed the cabinets from the wall, gently place them down on the ground.
- Use a putty knife to scrape off any old caulking or sealant around the edges of the cabinet.
- If the cabinet is painted, use a heat gun or hair dryer to loosen the paint around the edges of the cabinet. Be careful not to overheat the wood!
- Once the paint is loosened, use a putty knife or scraper to remove any remaining paint from the surface of the cabinet.
- If you’re planning on reusing the cabinets, sand down any rough edges and apply a new coat of paint or stain.
- If you’re using a finish like a stain or paint (more on that later) that may be difficult to clean later, apply a coat of primer before putting on your top coat. This will help prevent any stains from bleeding through your top layer of paint and staining anything underneath it.
The primer will also make sanding easier, as it gives wood grain something to bite into while sanding instead of just skating over smooth varnish or lacquer coats like water on ice. After applying two coats of paint or stain and allowing 24 hours for each layer, you’re ready to reattach your cabinet!
Attach with screws placed every 4–6 inches around cabinet perimeters and at least 2 in high-stress points (corners).
What Should I Do With My Old Kitchen Cabinets?
There are a few options for what to do with old kitchen cabinets. You could donate them to a local Habitat for Humanity, or repurpose them into something else entirely. If you’re feeling handy, you could even try upcycling them into new cabinets.
If your cabinets are in good condition, they may be worth selling. Before you do that though, you’ll need to clean them up and make sure they’re in good condition. You can look at them with a critical eye and decide if they have any damage or hidden problems that need attention.
If your cabinets are in good condition but don’t match the new ones, they may be worth reusing or giving away to someone who needs them.
If your cabinets are damaged or beyond repair, then you’ll need to decide what to do with the wood. If it’s not too warped or damaged, you may be able to use the wood for another project like building furniture or other items around the house.
Should I Finish My Old Kitchen Cabinets?
There are a number of ways to finish old kitchen cabinets. Some people choose to paint the cabinets and others choose to stain or varnish them. The choice will depend on your budget, the style of your kitchen, and the condition of your cabinets.
Paint
If your cabinets are in decent shape and only need a bit of love, there are several ways to update them. One option is to paint the cabinets with high-quality acrylic latex paint. This can be done by professionals or DIYers, but it’s important to use the right type of paint.
Choosing the right color is also important when painting kitchen cabinets. You should choose a color that matches other fixtures in your home — such as countertops and backsplashes—as well as any existing flooring or furniture. The goal is to create continuity throughout the space while keeping things simple and cohesive across different areas of your home.
Painting old kitchen cabinets is an inexpensive way to update them without having to replace them. It’s also a good option if you have a limited budget or want a quick fix for your kitchen. Painting can be done with latex paint or oil-based enamel, depending on what type of surface you have.
Stain
Staining old kitchen cabinets can give them a more rich appearance and add depth to their color. Staining wood is a good option if you like the natural look of wood but want something that lasts longer than paint does. Stains are available in different colors and finishes so you can match your finished product to existing cabinetry in your home or office.
Varnish
The most expensive way to finish old kitchen cabinets is by varnishing them. Varnish creates a glossy finish that makes the wood look new again, but this method requires more time and effort than other options do because it must be applied multiple times before it cures completely.
If you have old kitchen cabinets, you may want to consider refinishing them. Refinishing is a cost-effective way to update your kitchen with custom cabinets. The following are some tips and tricks to help you complete this project.
To Finish Your Old Kitchen Cabinets
First, remove all the doors and drawers from the cabinet boxes. This will make it easier for you to reach inside the cabinet frame and sand everything down. Sanding will ensure that all rough edges are smoothed out so that no splinters remain when your new paint is applied.
Next, clean off any old paint or dirt with a damp cloth or paper towel; after cleaning, wipe down the surface with a tack cloth so there are no fibers left behind on the surface of the wood.
Next, apply an oil-based primer over all surfaces of each cabinet box (including sides and bottoms). Allow this primer to dry completely before moving on to painting. You can use paint brushes or rollers while applying this primer; just make sure that you avoid getting any primer on any surfaces where it would be difficult to reach later on during the final finishing stages (such as around handles).
Once all surfaces have been primed, begin applying a layer of latex paint over them using either spray or brush application methods.
Final Thoughts
Kitchen cabinet removal might seem like an intimidating task to accomplish on your own, but by following the steps in this guide, you’ll have an easier time getting the job done.
How To Change Kitchen Cabinet Color
Figuring out how to change kitchen cabinet color is a useful way to increase the resale value of your home and the appeal of the kitchen.
Kitchen cabinets are one of the most eye-catching features in the majority of kitchens, so you might be surprised to learn that your cabinet color scheme doesn’t necessarily have to match the rest of the décor in the kitchen.
With some strategic painting and careful sanding, you can create beautiful custom color cabinets that will suit the style of your home perfectly and give your kitchen that little extra something special it’s been missing. Here’s how to change kitchen cabinet color safely and effectively!
The Basics: White Cabinets
The white-cabinet look is timeless, and there are ways to make it look modern, sleek, and sharp.
The first step is choosing a good base coat: You want something that doesn’t contain lead, which can off-gas for years in your home —basically, anything that says lead-free or no lead on it is OK.
Then you want to use an oil-based primer over your existing cabinets; if you have metal ones, you may need a separate primer for those. A paint-and-primer combo or a waterborne primer (meaning safer for your family) work great too.
Another option is water-based paint. It’s healthier than oil-based paints, and it’s environmentally friendly. It’s best for light colors, so it’s not an option if you want a dark color like red or purple. Some water-based paints even come in options that have zero VOC (volatile organic compounds), which can also be better for your family (just check your labels).
If you do choose a white or very light shade, be sure to buy low-VOC paint.
Kitchen cabinets are the most prominent feature of any kitchen, you’ll want them to look their best. They are what sets the look and feel of the kitchen, and they attract the most attention. If you’re the type of person that is seeking a modern kitchen look, then there are several trendy colors to choose from.
White kitchen cabinets are a very common color of cabinetry that works in a wide range of different kitchens, and they are very popular in stylish modern kitchens. This can be because they have a classic look and a simple-to-match style.
Because of its capacity to give the kitchen a sleek, orderly, and modern look, white kitchen cabinets are a flexible hue that many people choose for their cabinets.
The other reason that white cabinets are so popular is that they can be paired with a whole assortment of different colors, and the colors are not limited to kitchen colors. This means that you have the ability to get creative and combine colors between your fireplace, living room, or dining room with your white cabinets.
The Basics: Wood Cabinets
If you have wood cabinets, there’s a good chance you painted them at some point in your life. The most common mistake people make is not cleaning and prepping their cabinets before painting.
If your cabinets are dirty and covered in grease, or even if they’re just stained with leftover cooking residue, paint won’t stick very well and will show scuffs easily. For an easy way to clean your cabinets quickly, mix one cup of bleach into one gallon of water and pour it on your cabinets. Just leave it for about five minutes then wipe it down with paper towels or a damp rag.
If you’re repainting your wood cabinets, you don’t need a primer if they’re already clean and smooth. With your surface ready, it’s time to apply two or three coats of paint. For lighter colors, use one-and-one paint and for darker colors, use two-to-one paint.
This is because darker colors have less white in them and will therefore be easier to cover with just one coat. You may need several layers on a darker color of paint or special techniques like glazing—where you add thin layers of another color on top of your base coat—to get deep saturation without showing brushstrokes.
The Basics: Stain Color
Before you can change your cabinet color, you need to figure out what kind of cabinets you have and what kind of stain they’re likely made from. If they’re unfinished pine, you can apply a new coat of varnish or paint as needed.
But if they’re wood-grain coated cabinets, it may be impossible to change their appearance without replacing them.
Painted or Solid Color: You’ll have to figure out if your cabinets are painted or completely solid wood. Solid wood will retain its current finish even after additional layers are applied; painted units may need sanding prior to application and then touch-ups after a fresh coat are added (if desired).
The Paint: Another thing that affects your results is the paint type.
If you’re looking for a change of color, you may have a few different options. The most obvious option is an all-over paint job. Although it can be expensive (especially if your cabinets are made from wood), it’s also one of the easiest ways to update your look.
If you don’t want to remove your current doors or drawers, consider rolling on new paint instead; as long as your original units are in good shape, painting them should produce excellent results.
Additionally, painting allows you to choose from a wider range of colors and finishes than staining does — and it can usually be completed with significantly less hassle than replacing cabinets altogether.
Method For Staining Cabinets
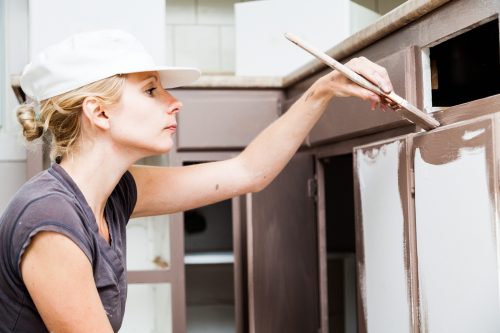
Start by sanding the cabinets to create a smooth surface. Doing so will assist the paint or stain in evenly adhering to the cabinets. If you’re painting your cabinets, use a primer before applying paint.
Choose a high-quality paint designed for kitchen cabinetry. For staining, select an oil-based gel stain or water-based polyurethane gel stain. Apply the chosen product with a clean cloth, working in long strokes in one direction until evenly applied. Wipe away any excess product with another clean cloth as you go along.
Next, apply a primer to help the paint adhere to the cabinets.
The excitement of starting a new home improvement project can quickly turn into frustration when things don’t go as planned. If you’re trying to figure out how to paint stain color on cabinets and the results are less than satisfactory, don’t despair.
With a little patience and the right technique, you can achieve professional-looking results. One common mistake when painting cabinets is not using a primer first. A primer provides a smooth surface for the paint to adhere to and also helps it achieve better coverage.
Once the primer is dry, you can begin painting your cabinets with the stain color of your choice. If you’re unsure how to change kitchen cabinet color, consider hiring a professional painter or staining company to help you out. They’ll be able to advise you on what colors will work best for your space and provide guidance on how to change kitchen cabinet color, and achieve the perfect look.
Be sure to let each coat of paint dry completely before adding another.
Many people choose to paint their cabinets because it is an easy and inexpensive way to change the look of their kitchen. However, before you start painting, there are a few things you need to do in order to get the best results.
First, you need to sand down the cabinets so that the paint will have something to grip onto. Next, you need to prime the cabinets with a good-quality primer. Once the primer is dry, you can start painting your cabinets with whichever color stain you have chosen.
Final Thoughts
Changing your kitchen cabinet colors is a great way to have your kitchen looking new again, and considering these tips above will be a good way to start you off on the right track.
How Much Does a Kitchen Renovation Cost
When it comes to renovating your kitchen, the main question you may ask yourself is how much does a kitchen renovation cost? If you are on a tight budget, the question of kitchen price is very important. The cost of kitchen repairs can vary greatly. However, it is possible to remodel your kitchen with any budget. In this article, we will tell you what the kitchen remodels cost depends on.
What does the price depend on?
It is not a secret that the final cost of kitchen renovation consists of many components. You can calculate the final result individually only by knowing all the initial data of your house as a whole and the kitchen separately. There are a lot of details that will influence the cost of remodeling.
Materials
One of the expensive things is the material that you will use for repairs. It can cost a fortune to completely remodel the kitchen with the replacement of the headset and cabinets, as well as the floor and other things, especially if you want to use such materials as:
- Marble;
- Quartz;
- Granite;
- Solid-surface material.
However, it is possible to reduce costs by using less expensive materials. If you have plans to replace only the floor or headset, then the cost will be slightly lower. You can find such material that will be within your budget and meet your needs.
Custom-made or not
Another important point in the repair of the kitchen is what, for example, the headset or cabinets you need. The price of a custom-made headset will be significantly higher. Going budget-friendly at the retail shop can save you money. To give a more individual look, you can add small details to the cabinets, and it will still be cheaper.
Scope of work
Kitchen renovation can involve both complete replacements of everything from cabinets to the floor and partial replacement or renovation. If you want a brand new kitchen and you plan to replace everything or even redevelop it, then be prepared to pay a significant amount of money for it. However, if you want to slightly update the design, add something new, or, for example, buy new cabinets and paint the walls, then you can easily do it even if your budget is limited.
Additional details
Additional details can also affect the final cost of a kitchen renovation. There are a huge number of designs with built-in lights, built-in kitchen appliances, or little things like a dish dryer and these are additional costs. If you want to save money, then you can buy kitchen utensils in a retail shop, instead of looking for something made individually for your kitchen.
Benefits of renovating your kitchen
When you want something new in your life, you may think about home renovation. Many people try to renovate the kitchen as this place is the heart of any house, where people spend a lot of time. And if you decide to renovate your kitchen, you get plenty of benefits.
Increase property value
Kitchen renovation is one of the best ways to add value to your home. If you decide to sell your house, then kitchen remodeling pays off. Moreover, an upgraded kitchen will speed up the process of finding a ready buyer. the renovation of your kitchen with the help of specialists is very beneficial to you as a homeowner. You should not underestimate the advantages of a kitchen renovation. You will be glad to know that the money you have invested has led to a high value of your home.
Creating a comfortable space
Kitchen renovation can improve comfort in several ways. You can add a kitchen island and it will increase the convenience of working there. You can add more storage space, thus making your kitchen a safer place to work in. When you are considering flooring, choose a material that is resistant to slipping. That is why when planning your reconstruction you should consult with professionals. Consider the features that make your work in the kitchen safe and comfortable.
Upgrade your home decor
If your house is not beautiful enough, then renovated kitchen can help to upgrade the appearance, regardless of whether you install new floors, new cabinets, or new countertops, or you just want to compliment the design with kitchen utensils. It will be much more pleasant for you to be in such a kitchen. Here are some ideas that can help you refresh your kitchen:
- Paint your cabinets;
- Replace hardware;
- Find new fabrics;
- Add cabinet accessories and drawer organizers;
- Install a backsplash.
As you can see, a kitchen renovation can be a perfect idea if you need to refresh the appearance of your home. This can be done in many ways, so even if you have a limited budget, you can still upgrade the kitchen.
More functional cooking space
Many homeowners primarily use their kitchen for cooking, and remodeling is the perfect way to make this space more functional. You can install new countertops, lighting, and modern kitchen appliances to turn your kitchen into a place where you will feel yourself as a professional chef. Cooking in the renovated kitchen becomes easier, more exciting, and more effective.
Important things to remember when renovating your kitchen
Kitchen renovation is a complicated process that takes a lot of time and money. In order for the process to go smoothly and without unexpected incidents in the form of unplanned expenses, you must take into account some details.
Labour
The kitchen renovation project requires a team of professionals. The number of people involved will vary depending on the type of tasks associated with your renovation project. Before starting the work, discuss various labor costs with the specialist to avoid any unexpected expenses.
Planning and research
Planning is a very important stage before starting a kitchen renovation, whether you do everything yourself or with a team of professionals. When making renovation yourself, you will have to spend a lot of time researching to find a suitable design for your layout. Try to plan everything in advance, otherwise, you will have to redo everything.
Doing necessary updates only
If you want to save money, there is a perfect solution for you. You can plan the renovation project in stages. Start from the beginning with the necessary tasks only. Evaluate your kitchen and first do only what is really necessary. Perhaps you only need to change one of these things:
- Cabinets;
- Headsets;
- Flooring;
- Lighting;
- Kitchen appliances.
Don’t try to change everything at once. This will help you plan the details of the project and finances. The main thing is to approach this process responsibly and not spontaneously.
Total kitchen renovation cost
The total cost of a kitchen makeover may vary. The total price depends on the size of the room, the quality of the materials, and whether the layout will change or not. However, you can plan approximate expenses in advance to understand whether you will meet the budget or not. Working with a professional team, you will be able to plan a budget and update the kitchen without unnecessary and unforeseen expenses. The updated kitchen will be a place where you can gather with friends and family or just spend time relaxing. So all the investments will be worth it.
Sage Green Kitchen — How to Make it Right
If you want a sage green kitchen — there are two news for you: first, you have a taste. And second, just choosing the right color out of more than 10 million options in the world is not really enough to make it right.
Why Choose a Sage Green Kitchen
Sage Green is a color of choice for people who value comfort, calmness, and despise abrupt emotional bursts in their interior. It’s a soothing color, the one that will make your kitchen cozy and chill. It’s no surprise that according to Benjamin Moore, one of the oldest and the most famous painting companies, it’s the color of the year for 2022.
The problem is — you can’t make ALL your kitchen sage green. It’s a pastel color, and it would look… well, weird. So even if you choose a sage green kitchen — you have to choose other colors as well, spread them evenly and naturally around the kitchen, and make it look satisfying.
What Colors Go with Sage Green?
Sage green, aka gray-green, is pretty universal, and at the same time — dangerous. It opens up in synergy with both other pastel colors and contrasting colors as well. Even though interior design knows no boundaries and you may have your own ideas in mind — we suggest these options as best colors to accompany your sage green kitchen:
-
Sage Green and Pastel Pink (from Crepe and Baby Pink to Rose Quartz)
Pink goes well with gray-greens (like sage green) and looks amazing in the kitchen. It adds brightness where it’s needed most, while at the same time maintaining cozy appeal.
-
Sage Green & Gold (in all its variations)
This combination creates an elegant and sophisticated look that we all dream of having in our homes. It is warm, luxurious and inviting.
-
Sage Green & Ochre (to make it look classic)
Oochre is always relevant and conveys a strong sense of home. It’s pretty comfy, as well as being universally appreciated.
-
Sage Green & Purple (from English Violet to Thistle)
Purple is associated with royalty, grandeur and extravagance. It goes very well with sage green, being not too bright and not too dull.
-
Sage Green & White (because you can’t miss with white)
They say that white goes on everything. We couldn’t agree more. It’s always appropriate and in vogue, both in the kitchen and elsewhere, so this combination is a must.
Now, you can use these combinations to your taste, or you can use them wisely: all combinations work better in different lighting.
For a Dark Kitchen: use sage green and white. A dark kitchen is usually associated with dirty and worn-out walls — and they can easily be changed by painting them perhaps with a very light sage green.
For a well-lit Kitchen: use purple and white. Light rooms have lots of possibilities, especially when it comes to decorating. A bright purple will bring up the brightness of your kitchen, while still maintaining its elegance and sophistication.
For a cramped kitchen: choose ochre and white. Ochre strikes a balance between being classy and warm, and it will not overpower the room with its vibrancy.
Using a combination of different colors, you can create some cool optical illusions — for example, painting a wall in sage green hue with just a touch of pink will give the impression of an overall pastel shade.
Can You Use Two Tones of Green in One Kitchen?
A question frequently asked by the members of our community is — can you use two different shades of sage green in one kitchen?
Here’s what we think: Yes. You definitely can!
You can choose, for example, a brighter shade for the walls and a darker one as an accent color. Or you can paint your kitchen with two shades of gray depending on your liking.
How to Combine Two Tones of Green the Right Way
First of all, choose your main color. It should be darker than the second, contrasting color. If you’re going for two shades of green — choose a darker one for the walls and a lighter one as an accent color:
- Darker green on the walls, with brighter green cabinets;
- Two shades of sage green on different walls, depending on the light (note that painting different walls in different colors may create unwanted optical illusions, like making the kitchen look smaller than it is, so you have to be careful with it);
- Darker gray on the walls, with lighter sage green cabinets (or vice-versa).
These combinations can create a quiet and relaxing atmosphere in your kitchen — ideal for morning coffees or afternoon tea.
Sage Green Kitchen Furniture — is it a Good Idea?
In short — yes, it is! But it’s not that simple. Sage green’s bright color and its furniture-friendly nature does not make it a suitable color for everything. For example, a sage green kitchen table is way less appropriate in the majority of modern kitchens than, say, sage green cabinets.
Sage Green Cabinets
Cabinets can be painted in any shade of green you like, whether it’s sage green, ochre or violet. Also, you may choose any type of cabinet — wooden or built-in.
When looking for the perfect shade of sage green, keep in mind that not everything goes well with this color. Make sure that your new cabinets go with other colors already present in the kitchen (such as floors and walls).
Sage Green Countertops
Countertops can be painted in any shade of green you like, whether it’s sage green, ochre or violet. Also, you may choose any type of countertop — wooden or built-in. If you decide to go for a darker shade of blue, you can always use dark brown countertops as an accent and combine it with white cabinets.
Sage Green Appliances (if you find any)
There are two kinds of appliances: those that won’t get in your way and those that will.
Those which won’t get in your way… grant them the freedom to be colorful (this is true for coffee machines, juicers, mixers and most other kitchen appliances). Those which will get in your way… maybe should be more subdued.
As for color combinations, keep in mind that every door and drawer handle can be painted a different color. While we seriously recommend staying away from pink accent details, even if it’s the most subtle and pastel pink you can find (sorry, it’s a kitchen you’ll have to use daily, not a 1950s furniture ad from the space age), gold details on sage green furniture can help you make it look more expensive. Unless, of course, you have too much gold.
The Final Advice On Your Sage Green Kitchen
Sage green is a win-win color in every way that counts, but you should be careful with it. Yes, it’s trendy. Yes, it’s subtle and comfy. Yes, it’s stylish, according to all possible modern standards. Is it a reason to save on a professional designer and just paint EVERYTHING in sage green? Nope, no way. As the famous saying goes, “Poison and medicine are often the same thing, given in different proportions”. With colors, it works exactly the same way.
Pros and Cons: U Shaped Kitchen
It is always difficult to decide what kind of kitchen you need while renovating your house. There are plenty of ideas and one of the most popular is the u shaped kitchen. This type of kitchen is ideal for those who want to be able to see everything from different angles. Keep reading this article to find out more about the u-shaped kitchen and its pros and cons, so you will be able to make the right decision.
What is u shaped kitchen?
If you’ve never heard about a u-shaped kitchen then this article is definitely for you. Let’s start with understanding what it is and what it usually looks like. Usually, in such a kitchen, various cabinets and appliances are located along three adjacent walls. This way they create a form close to the letter u. This is an effective design that gives your kitchen a stylish modern look.
Pros of u shaped kitchen
Among the many ideas, this is perhaps the most practical design. Such type of kitchen is suitable almost for all sizes and shapes of rooms. There are plenty of advantages that will affect your choice, but let’s discuss the most common ones.
A lot of places for storage
When you have a lot of kitchen utensils and other things but the typical kitchen is too small, then a u-shaped one is a good idea. Thanks to the three connected walls, there is enough space for cabinets. It means a lot of free storage space.
In u-shaped kitchens, there may be a place even for a kitchen island. With the help of this idea, you can add even additional counter space and storage.
You can easily cook with other people together
Another cool advantage of such a kitchen is the opportunity to be there with other people without creating traffic by sharing your responsibilities. You can cook back to back and go about your business without interfering with each other. If you have children, you can also use one part of the kitchen for cooking, and allocate the other two to children. Another advantage follows from this one.
Three necessary kitchen zones can be placed there
As you already know, in such a kitchen, surfaces and cabinets are placed along three walls, respectively, each side of your kitchen can be used for a specific zone. In this case, it will be much easier to keep your kitchen clean and avoid mess while cooking. If you cook with other people, then you can just share your responsibilities and each of you takes one side of the kitchen.
More cooking space
One of the main benefits of the u-shaped layout is that it allows you to have more space for cooking while keeping your workspace in a separate part of the kitchen. This will be very useful if you want to spend some time on other activities besides cooking.
There are even more advantages than you can imagine. So what other advantages does such a layout have?
- It lets you see what’s happening around you with ease;
- It allows for easy access to the dishwasher and refrigerator;
- There’s more room for comfortable seating.
Cons of u shaped kitchen
For a more efficient and functional kitchen, a u-shaped layout is suitable. Thanks to all the traditional amenities and appliances arranged symmetrically, this configuration will leave you plenty of room to move around. However, despite all the advantages of such a kitchen, it also has its drawbacks, which are important to take into account to avoid further problems.
Corner cabinets
For some people, corner cabinets are a huge problem, as it is more difficult to get to them, not to mention the items that are piled up in the farthest corner of the cabinet. Another problem with corner cabinets is that they take up too much space. In many homes, every piece of space is important, so if you plan to use such a kitchen layout, make sure that your kitchen area is large enough for it to work.
Such a kitchen takes away floor area
If you install cabinets on all three sides, this will significantly reduce the floor area. Due to the small area, the kitchen may seem too enclosed. Moreover, you are surrounded by three high walls of furniture and household appliances. It also takes up a lot of space, you may also feel too enclosed in the walls of your kitchen. However, this disadvantage is not always relevant, because everything depends on the size of the room in which your kitchen is located.
Not budget-friendly
This is probably one of the most unpleasant disadvantages. Due to the fact that three walls are involved in the layout of such a kitchen, buying cabinets and kitchen appliances can be quite expensive. The more spacious the kitchen, the more you will spend on the buying of household appliances and countertops.
No space for a large work surface
One more problem with the u-shaped kitchen layout is that it doesn’t include a large work surface. For some people, this option can be a bit inconvenient, especially if they like to show off some unusual serving dishes or kitchen utensils. If so, you can consider other kitchen layouts, for example, with an island (plus there is always the option to add it yourself).
How to design u shaped kitchen
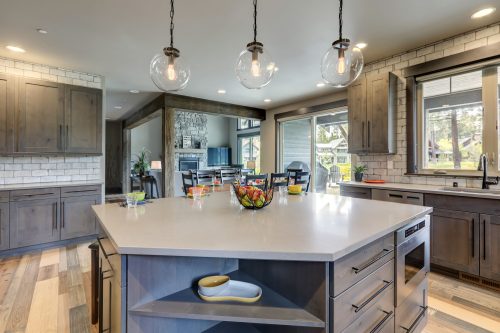
One of the most popular kitchen layouts around the world is the U-shaped design. This layout provides ample space for cooking and cleaning, as well as many other areas. Designers often create a u-shape kitchen considering all the different activities that will take place in the kitchen: cooking, cleaning, socializing. If you have already decided for sure that such a kitchen is what you need, that’s great. The next question you may have is which layout is better. Here we are going to share with you the most popular ideas.
U-shaped kitchen with peninsula
The first is undoubtedly a U-shaped kitchen with a peninsula. This layout includes a peninsula that is elevated on the corner of the wall. A peninsula is a great idea for creating such a type of kitchen in a large space.
U-shaped kitchen with island
The next one is a U-shaped kitchen with an island. Perhaps one of the most popular designs for large rooms. These are the only ones that have a separate island that can be used for storing and cooking food. Moreover, you can also put in it some personal items that you like or decorative elements and plants.
Central dining table
If the idea of a kitchen island does not suit you, then you can place a kitchen table in the center instead. A large central dining table in the kitchen is also one of the popular ideas in this area as it gives you a convenient place to sit and eat, and even relax while somebody else is cooking.
Open shelving
One of the disadvantages of such a kitchen is an enclosed space, so if you want to avoid the feeling of isolation, then open shelves instead of cabinets are for you. This option is especially suitable for small rooms, so you will have enough light and the kitchen will not look closed. In this case, you will have a little more space for storing food and even some tools for cooking.
Handless cabinets in a small kitchen
There is one good way to get the most use out of your space. You can buy units that are handleless and open themselves outwards thanks to clever hinges, giving you a lot more storage space.
Mirrored cabinets
Another great idea for a small kitchen is cabinets with mirrors. They provide excellent reflection, which helps to make your small kitchen bigger and brighter. Moreover, such cabinets are practical, save floor space, and they offer a number of advantages.
What materials to use for such a kitchen?
When choosing furniture for your future kitchen you should remember one important thing. The materials you use for this kitchen should be as similar as possible. Many types of them can be used for countertops and kitchens in general. You can easily find a great number of materials to use when designing a U-shaped kitchen:
- Veneer sheet goods;
- Face frame cabinets;
- Solid wood cabinets;
- Slab doors and drawers;
- Laminate countertops;
- Wood or granite for the backsplash.
The final choice of material depends on the amount of money you have to spend and the aesthetic beauty that is necessary for the kitchen. If you have enough money for quality materials, then you can consider granite or marble countertops that will last longer than other materials and make your kitchen exquisite.
Are u shaped kitchens out of style?
Not at all! However, If the only thing that keeps you from installing this type of kitchen is the fear that such a kitchen will go out of fashion, we will say with confidence that you have nothing to fear. This arrangement of cabinets and other kitchen furniture will be relevant for a long time, it is better to pay attention to the design and choice of the color palette. There are many design options for such a kitchen and you can find what is right for you and what will always be relevant. In fact, they are very intentional in a lot of homes now. Here are some tips and ideas on how to design your own u-shaped kitchen with style:
- Choose light colors;
- Include lots of natural lighting;
- Open up hallways and rooms;
- Choose good quality furniture;
- Maximize floor space.
Now you know why u-shaped kitchens are so popular. They take up less space than a linear kitchen and provide enough space for cooking and storing food. An unobstructed view also helps to maintain order in the kitchen. The popularity of u-shaped kitchens is growing due to the many advantages they can offer compared to traditional linear layouts. Yes, there are some disadvantages, but compared to the pros, they seem insignificant and the problem can be easily avoided.
5 Mistakes to Avoid Before You Start a Kitchen Renovation
Kitchen renovation is not an easy task, it is a time-consuming and costly event, therefore it is so important that everything is carefully thought out and planned before you start a kitchen renovation to avoid common mistakes.
5 questions to ask yourself before you start a kitchen renovation
The first and most important factor in the renovation of the kitchen is the proper planning of upcoming work. Whether it’s your first kitchen renovation or you are a professional, you should ask yourself 5 important questions that can help you avoid common mistakes.
What are the average kitchen renovation costs?
The first question that comes to mind after thinking about renovation is related to the average price of it. Of course, you need to realize what exactly you want to change in your kitchen as the price will depend on your ideas.
You need to think about what exactly you want to change to avoid surprises. Maybe you only want to change the furniture or the idea of a complete renovation of the kitchen is in your head. As for the average cost, it can be up to $50,000 for a complete kitchen renovation.
Many factors affect the price one way or another, such as the flooring material or the equipment that you will need. Try to think through every detail in detail and make a budget, adding 20-25% over to it to cope with surprises.
You need to think about what you really need and what you will use more often to save on other things. For example, if you constantly use a stove or oven, it’s not the best idea to save money on it. Before the renovation begins, it is better to make a complete shopping list and set up a budget that you will stick to.
PRO tip: In case you want to avoid pointless expenses on something that won’t match your whole project, you can make samples and carry them around with you.
Do I need a kitchen renovation contractor?
The next thing to think about is contractors. If you want to save money and meet your budget, as well as do everything quickly and efficiently, then you need to find qualified contractors.
There are quite a lot of ways to find them: you can ask around from friends, search the Internet or go around companies near your home. But do not immediately choose the one and only one. To begin with, choose several contractors, talk to them. It will be better if you can see examples of their work, prices for services, and evaluate your capabilities. Then you will be able to choose a specific contractor based on the best price for you.
Here are some tips that can help you choose and hire contractors:
- Ask for proof of insurance. Contractors should carry personal liability, workers’ compensation, and property damage coverage.
- Consult with your local building department to find out local licensing requirements. Ask to see the contractor’s license and make sure it’s current.
- Ask for a list of references, and call at least three. Find out what projects the contractor has completed in the last year.
- If hiring a general contractor, find out what subcontractors they will hire.
- Interview more than one contractor for the job and ask for written proposals/estimates.
- Specify whether the contractor has its own production.
- Check with the company whether it has a technical supervision department, how the quality control of construction is carried out, what documentation is carried out during the construction process.
By hiring a contractor, you save yourself from the need to make calculations, make a work plan to find out the price of repairs, select and purchase materials. Contractors provide a full range of kitchen improvement services.
Where to find a kitchen renovation design?
The main mistake in the renovation is not to seek help from professional designers. Some people believe that they can cope with kitchen renovation themselves, but in the end, it may happen that there will be no room in the kitchen at all and every time you are in the kitchen you will be stressed. Do you really want this?
The kitchen designer knows tricks that you don’t know about. Here are some things that you’ve probably never thought about but with the help of which designers will be able to improve the kitchen.
Kitchen zones
Perhaps the most important thing that the designer will help with is the development of kitchen areas for each task you will do in the room, like cooking, supply storage, and food preparation. Proper kitchen design will reduce the time spent on cooking. Ideally, the kitchen should include work zones for the following:
- Foods. Storage for groceries, including non-perishable items, refrigerated and frozen foods
- Dishes, Etc. Space for dishes, glasses, cutlery, and odds-and-ends, such as scissors or desk items
- Cleaning. An area for recycling/waste management with recycling bins and trash cans, and space for household cleaning items
- Food Preparation. The main work area with access to utensils, knives, small appliances, cutting boards, mixing bowls, etc.
- Cooking. Where you’ll find pots, pans, bakeware, cooling racks, etc.
Lighting
No less important is the correct lighting. It illuminates workspaces, such as countertops where you are prepping food or inside a pantry closet so you can see what goods are stocked on those shelves.
Kitchen islands
Do you want a kitchen island but don’t know how to fit it into your project? Whether you have a big kitchen or not, designers can help you and suggest different ideas that suit your kitchen. So, no more head pains and stress.
If the budget is not very limited, and you think that you cannot cope with this task on your own, then it is better to use the services of a professional designer. Remember, if you have any questions or ideas on how to make your kitchen more comfortable, or you probably have dreamt about something special, this service is what you exactly need.
How long do kitchen renovations take?
Kitchen renovation isn’t a matter of just one weekend. It can take weeks or months to complete and might involve a general contractor, designers, plumbers, or even architects. However, you should accept that the more you renovate the kitchen the more you live without it.
Experts estimate an average kitchen renovation project can last up to 9 weeks, depending on the scope of work. Large kitchens with complex refurbishing could take anything between 10 and 12 weeks while carrying out a full larger kitchen remodeling project could take about 3-5 months.
But If all materials are ready and available on the worksite, a kitchen can be installed in as little as three weeks.
With that in mind, try to find backup options and think ahead of where you will be cooking, eating, and washing the dishes during this period of renovation.
How to survive a kitchen renovation?
When you’ve made all decisions and have a set budget, it’s time for demolition and you’ve got to function in a home under construction. You’ll realize the kitchen is the epicenter of the home and you’ll face difficulties of living without this space or at least working around the mess. But living in dust for a while is worth the reward of a new kitchen.
Here you can find tips that can save your time and make your life during renovation easier.
- Set up a makeshift kitchen with microwave, coffeemaker and oven.
- Wash dishes in your bathroom but it would be much better to use paper plates and cups.
- Buy ready-made food or use food delivery from restaurants.
- If you have a grill cook meals outdoors when the weather allows it.
As you can see there are plenty of things you need to consider before renovating your kitchen. Your design choices will impact how much money and time you spend on renovation and how much time you spend on tidying later.
The kitchen is the heart of the house, the center of family life, so it is very important that it is not only beautiful but also comfortable. That is why everything mentioned in this article should be carefully considered.
What Should You Know About Kitchen Appliances?
At some point in their life, everyone has stood in their kitchen and thought that they could get more out of their kitchen appliances and overall setup. No one wants to be bumping their way around the kitchen while reaching around large appliances. On the flipside, small appliances can sometimes be frustrating as well if they don’t do their job properly, so how is someone supposed to know what kind of major appliances to get for their kitchen?
Kitchen Appliances
Fitting new kitchen appliances into your kitchen area can become a nightmare if you’ve never done the research to figure out what type of setup you’re looking for. Walking into a kitchen with appliances scattered in each and every direction can cause you to feel flustered and annoyed, and that isn’t something you want to feel after you just get home from a long day of work.
If you have a small kitchen, it can be difficult to fit in all of the kitchen appliances properly. Even if you have a large kitchen, you might have too many kitchen appliances that just don’t look right. There are a number of factors to keep in mind when you’re thinking about kitchen appliances, and sitting back and doing some research into it can go a long way in ensuring your kitchen will look much better.
Large Kitchen Appliances
Large kitchen appliances typically consist of your stove, fridge, and your dishwasher. Some people like to place the dishwasher beside the stove, but a lot of it boils down to personal preference in how you end up arranging things.
Figure Out Your Kitchen Zones
Having a neat and organized kitchen will increase how effectively you’re able to cook, clean, and maneuver yourself around, and that’s exactly why you should be setting up your kitchen into specific zones.
- Food storage zone
- Food prep zone
- Pots and pans zone
- Cleaning and disposal zone
- Cutlery/China zone
When you separate your kitchen into specific zones, you’ll be able to situate your large appliances in certain areas much more efficiently. Many people like to situate their stoves in the food prep zone. Integrated appliances can also really help you with your zones and increase organization throughout your kitchen. Built-in appliances increase the room and counter space you’ll have, and that means more room to cook food and store things on the countertops.
Some people like to get a cooktop and a wall oven that will have cabinets surrounding each side. Your kitchen zone will all boil down to your personal style and what you want out of your kitchen. After you’re done organizing the large appliances in your kitchen, you can start working on the smaller appliances.
For those that are newly renovating a kitchen, you’ll want to keep the working triangle in mind when you’re doing that. A kitchen working triangle consists of the three main functions of your kitchen:
- The stove
- The refrigerator
- The sink
When you set your kitchen up with a proper working triangle, you won’t be moving around as much when you’re cooking or baking things. It increases the overall functionality of your kitchen and will go a long way in reducing headaches and frustration while navigating around. Another thing to keep in mind is the sizes of appliances in your kitchen. If you get appliances that are way too small, then that could get annoying. If the appliances are too large, then you might run out of kitchen space very fast.
When thinking about your kitchen appliances, you’ll have to carefully consider what you want out of them. If you have a lot of people all of the time, then going with larger ones makes more sense to you. If you’re the type of person that only has coffee once a week, then you don’t have to be investing in a massive coffee maker that will take up an entire corner of your counter space.
Small Kitchen Appliances
After you’ve figured out where the larger kitchen appliances are going to be situated, you can begin thinking about where you’ll put the smaller ones, while keeping the kitchen zones in mind. Putting your smaller kitchen appliances in the right places will go a long way in ensuring the overall functionality of your kitchen. If you barely ever use your mixer, you typically won’t want to be putting that in the spot where your microwave is located if you’re using that multiple times a day. If you haven’t used an appliance in the past year, then you might want to consider selling it or storing it in a place that doesn’t take up much room.
Cabinets
Many people’s kitchens tend to get cluttered with many different appliances that they barely use over time. If you find yourself in this situation, you might want to consider putting the smaller, barely-used appliances into your cabinets. Not everyone uses a blender every single day, and a blender is a product that can sometimes take up quite a large amount of counter space. Consider putting your blender in the cabinet and only pull it out when you’re going to be using it.
The blender being in the cabinet means it’s still right in the kitchen, and still not clogging up much-needed counter space. Keeping your cabinets organized will prevent you from thinking that it will turn into a hassle every time you want to be using certain products that are in the cabinets.
How Do You Make Use Of Kitchen Cabinets?
Sometimes cabinets can also get extremely cluttered and full of things that you don’t ever use. If that happens to you, you might want to think about getting some additional shelving in the cabinets. Extra shelving is usually never a bad thing, and the more shelves you get means the more room you have to store things. Lots of people enjoy rolling shelves because you can situate them in many different places. Rolling shelves are also flexible in terms of their height.
If you get a rolling shelf that has a solid top, you’ll reap the benefits of additional counter space that can be used when you’re preparing meals. It can be used as a chopping board to cut vegetables, meats, and any other food products. After you’re done using it, all you have to do is move it over to your stove to transport your food where you’ll then place it into the pot.
Appliane Garage
Making use of an appliance garage is another thing that can be used to increase the functionality of your kitchen. It will lower the amount of clutter all over your counter and also give you the ability to use your appliances whenever you need them by just opening the door of the appliance garage.
Pantries
Pantry cupboards are extremely handy for baking supplies and many other things. Some people use a pantry to store appliances, and that can go a long way in increasing your counter space and making more room available in your kitchen. Using your pantry space for kitchen appliances is perfect for the appliances that you seldom use. Setting up your kitchen in a way that you don’t have to move much will go a long way in increasing your happiness and comfort levels with it.
Hanging Microwave
If you want to clear up some space on your counters, getting a hanging microwave is another option to consider. Not only will a hanging microwave give you more counter space for other kitchen appliances, but it can also increase the overall aesthetics of your kitchen. Putting a hanging microwave close to the stove will prevent you from moving around too much while cooking certain dishes.
Design
When it comes to anything in the kitchen, the design of it is probably the most important thing. No amount of shifting appliances around and putting appliances in cabinets will help if the design of your kitchen is outdated and over used.
Classic Kitchen Designs can help you redesign your kitchen in a way that will have you smiling every time you go to cook something in it.
A Guide On The Best Flooring For Kitchens
No matter what type of home you have, having the best flooring for kitchens will always boost your mood every time you walk into it. It doesn’t matter if you have friends or relatives over, someone is always bound to comment on your kitchen floors. Everyone wants to be eating in a warm and cozy environment, and doing your kitchen right will ensure you’ll be feeling as good as you can every time you enter the kitchen.
Kitchen renovations are one of the most common renovation projects that people do in their homes. A full kitchen makeover will increase your return on investment, make the kitchen feel more functional, and will just make the entire atmosphere feel much better. A new kitchen renovation will have you wanting to spend more and more time in your kitchen in comparison to before a renovation where you might have never even wanted to step foot inside of it.
Creating a functional kitchen all boils down to how you design it. There are many different factors involved in crafting a kitchen that will feel just right. It involves:
- The right countertops
- Sinks
- Faucets
In addition to these things, you’ll need to consider what flooring for kitchens you’re going to go with. Many people like to use kitchen tile flooring, but kitchen hardwood floors are quite common, as well.
Kitchen Floor Ideas
It can sometimes take a bit of research to find the right kitchen floor that’ll work for you. Everyone has their own personal tastes and visions for how they want their kitchen to look, and the right kitchen floor will go a long way in ensuring your vision will be fully satisfied.
People spend a lot of time on their kitchen floors compared to other floors throughout their homes. You’ll be standing on your kitchen floors while preparing meals, talking with family, and moving to and from the kitchen table. Because of the amount of time you’ll be spending on your kitchen floors, you’ll want the floors to look aesthetically pleasing and very comfortable.
It’s no surprise that kitchen floors will be subject to messes and spills over the years, so you’ll want a kitchen floor product that’s not super difficult or tedious to clean. If you enjoy using your deep fryer, the oil will end up splashing on your floors from time to time.
Subfloor
Many people don’t give the subfloor a lot of thought, but they should because the subfloor is what supports your floor. Homeowners don’t really think about the construction that goes into their homes. If your subfloor is off-level and constructed poorly, that can affect what flooring options will work in your kitchen.
What Kitchen Flooring Options Are Available?
There are many kitchen flooring options you can choose from:
- Ceramic
- Porcelain
- Natural Stone
- Tile
Many people like to go with tile kitchen floors because of how durable it is. It’s also known to be extremely easy to maintain. The design options with tile are endless and it works well with many different kitchen elements. Tile floors in the kitchen can also range in budget depending on how much people are willing to spend.
Tiles are fairly easy to keep clean. The grout will get dirty from time to time, but it doesn’t take that much effort to clean up. With porcelain tile, you’re getting a product that is manufactured to look much like natural stone. It’s more durable than ceramic material. Natural stones are a little more expensive and you’ll have to use sealant on them every now and then.
For tile products to work well in the kitchen, you’ll need to have a subfloor that’s leveled nicely. If the subfloor isn’t level, then tiles can become quite an annoyance to install accurately. Sometimes homes can shift from time to time, and this can result in tiles cracking. If you get lucky, the crack will occur right on the grout line, but people have reported their tiles cracking right through the middle. Another thing to keep in mind is that the subfloor needs to be stable and sturdy to support heavy tiles.
Sometimes tile can end up chipping if you end up accidentally dropping heavy objects on it. Over time, ceramic tile is subject to wear and tear. Tile can get cold on the feet, and for that reason, it helps to have a heating supply built into it. This will raise the costs of it, but you might have regrets later down the road if you don’t do it.
If you’re standing on the tile for long periods of time, your feet can tend to feel sore after a while. Those that have joint issues or arthritis might want to think of getting a different type of kitchen flooring installed. If you’re fixed on tile no matter what, try getting a silicone mat and situate it in the places that you spend the most time standing.
Hardwood Flooring In The Kitchen
Hardwood floors work with many different kitchen designs, and you can usually never go wrong with this in your kitchen. Hardwood floors will be around forever, and they are also very long-lasting in your home. Even if you damage your hardwood by repeatedly dropping things on it, you can get the hardwood refinished and then just restain it later on. You can sand out scratches and if you have large ones, they can just be filled. If you have arthritis and your feet get sore after standing for long periods of time, then a hardwood floor is a wise choice to go with. It doesn’t hurt your feet as much as tile or stone.
One thing to note about hardwood floors is that your humidity levels need to be consistent so that the hardwood won’t end up warping down the road. Engineered hardwood is a bunch of layers of wood that are glued together, so that might not always occur, and it depends on what product you’re getting.
The maintenance for hardwood floors is higher than tile floors. Over time, you’ll notice debris and dirt getting into the gaps between the hardwood. You’ll have to reseal your hardwood every couple of years, and this can become frustrating for people that don’t want to spend a lot of time with the maintenance of their homes. If you’re dealing with a major spillage, that can turn into a nightmare and might even cause you to have to start pulling out hardwood planks. Red wine is one such product that can wreak havoc on hardwood floors.
The difficulty of installing hardwood floors can vary from one product to the next. If your hardwood is engineered, then it’s not too complicated because the planks will just snap together. If you’re getting pure hardwood, then they will need to be nailed right into the floor to reduce the chances of any warping.
Laminate Flooring In The Kitchen
Laminate flooring in the kitchen is another popular product that many people enjoy using because it can replicate the look of stone, ceramic, or wood. Laminate is one of the easier kitchen flooring products to install, and most of them just click together. The durability of laminate is known to be quite high, and most will find that it doesn’t scratch too easily. You’ll want to get a high-quality laminate flooring product to reduce the chances of deep scratches occurring.
The price range of laminate can start off to be fairly affordable and stretch to be expensive, but most people find that laminate is cheaper than going with tile or wood kitchen flooring.
A major disadvantage of laminate flooring in your kitchen is that it’s not always the best product if there is tons of traffic throughout the area. If you have 7 people in your family and people are always walking on the floor, then it might wear out faster in comparison to if you were the only person living in the house. Another thing to keep in mind is that laminate isn’t always the best product if you live in humid and wet living conditions.
Cork Flooring For The Kitchen
More and more people are considering going with cork flooring in their kitchens because of how earthy and natural it looks. It’s an eco-friendly option because it is manufactured out of tree bark, and trees will grow new bark every decade.
Additionally, you can get cork flooring in full boards or in tile form. There are a variety of different finishes and stains that you can choose from, and if you seal the product in the right way, it’s pretty good at resisting wet conditions, even as much as wood. The one main disadvantage of going with cork flooring is that it can be quite pricey. There also aren’t as many different designs that you can choose from with cork flooring.
Vinyl Flooring For Kitchen Floors
Vinyl is the easiest flooring to get installed. It’s convenient to clean and is also the cheapest product that you can purchase for your floors. You can get vinyl in full sheets or in tiles that come in different levels of thickness and durability.
You don’t need a fully level subfloor in order for vinyl to work properly, and that makes it ideal for older homes that don’t have a level subfloor. The vinyl will just roll right over the subfloor, but if you’re going with vinyl tiles, you’ll still want to ensure that the subfloor will be somewhat level.
The major downside of vinyl flooring is that it’s not too resistant to tear or scratches. If you always end up dropping products on the floor, you might want to think of considering a different kitchen floor product. For those that are on a budget, vinyl flooring is a good product to go with.
Before you go out and blindly spend a ton of money, you’ll want to get a few samples of different products to see how you like them. Getting a tiny sample piece of the flooring you’re interested in will help you test out its durability against scratches, tears, spills, and other types of damage.